With the help of tags, similar posts can be grouped together. Hence, it makes easier for the users to search a particular post. It tells the user what a post is about. Tags are similar to categories but still different.
Position of the tag may differ depending on the theme. Sometimes they may appear at the bottom, top, or in the sidebar.
How to Add a Tag
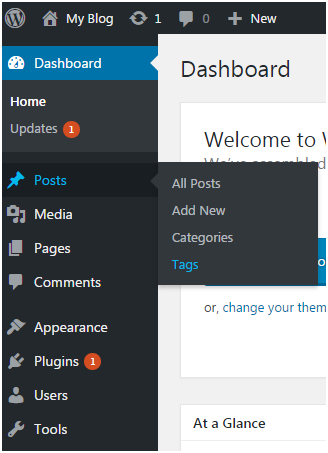
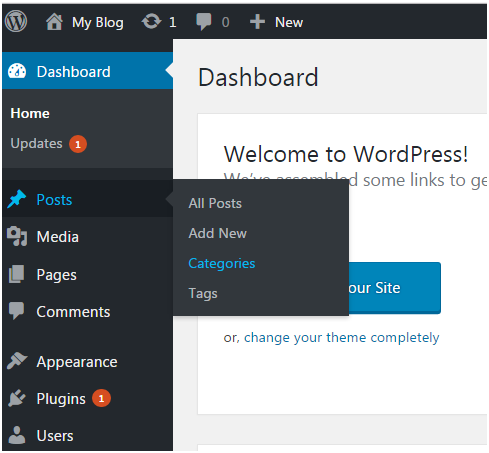
To add a tag, go to Posts > Tags
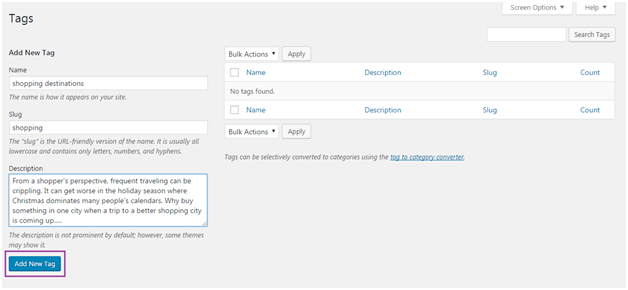
Look at the above snapshot, here you have to fill all the fields.
Name – Name of tag which must be unique. Here it is shopping destinations.
Slug – It describes a post in URL. It is generally in lowercase and contains only letters, numbers and hyphens. Here our slug it shopping.
Description – It is a brief intro about the tag. When you hover (bring pointer over the tag) the tag, this description is displayed.
After filling all the above information, click on Add New Tag button.
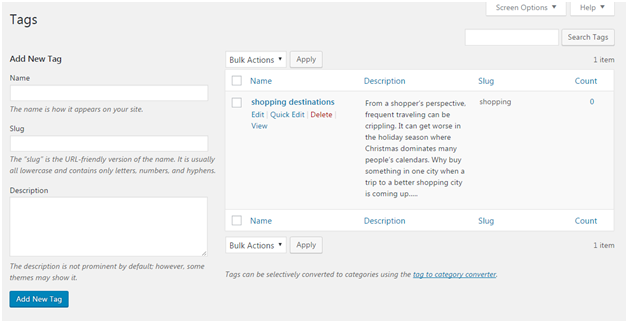
Following screen will appear in front of you.
Look at the above snapshot, on the right side, created tag is displayed.
How to Edit Tag
To edit a tag, go to Posts > Tag and bring the mouse over the tag.
Look at the above snapshot, two options to edit are there.
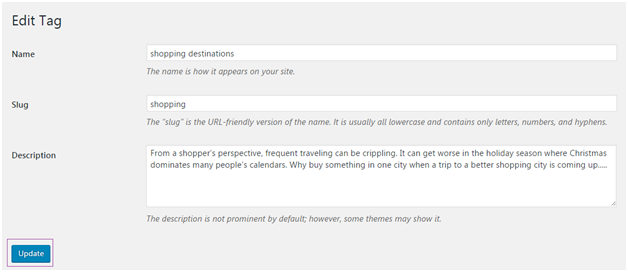
On clicking Edit, following page will appear.
Look at the above snapshot, after editing click on Update button.
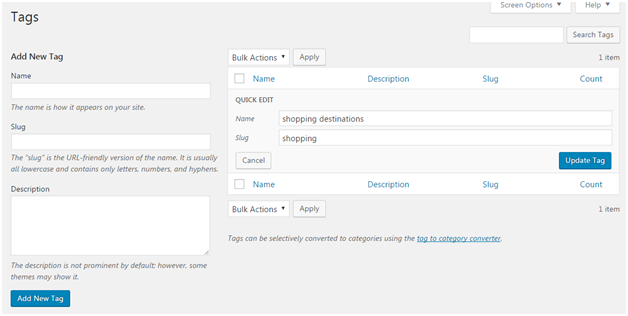
On clicking Quick Edit, following page will appear.
Look at the above snapshot, here you can only edit Name and Slug of the tag. After editing, click on Update Tag button.
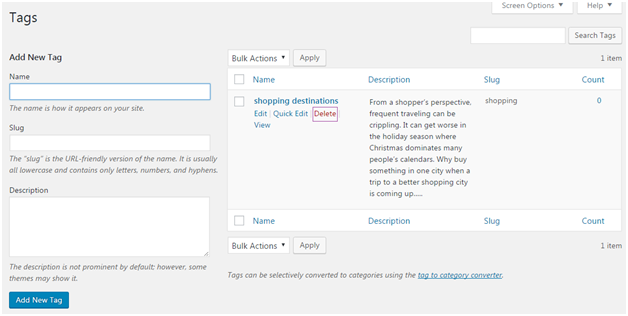
How to Delete Tag
To delete a tag, go to Post > Tag and bring the mouse over the tag.
Categories allow a user to divide its content into different sections. Different topics publishing in a single website can be divided into different categories. It tells the reader what a post is about and they can easily find their content from a lot.
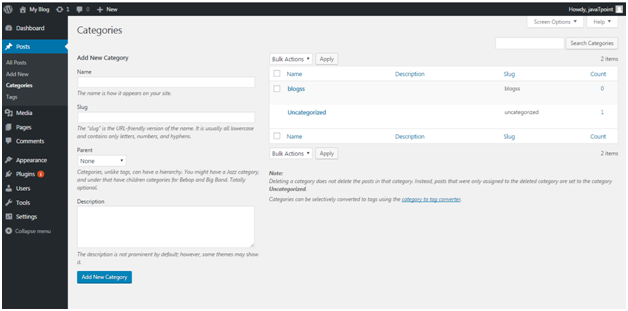
If no category is added, then by default category is uncategorized. To access category section click Posts > Categories
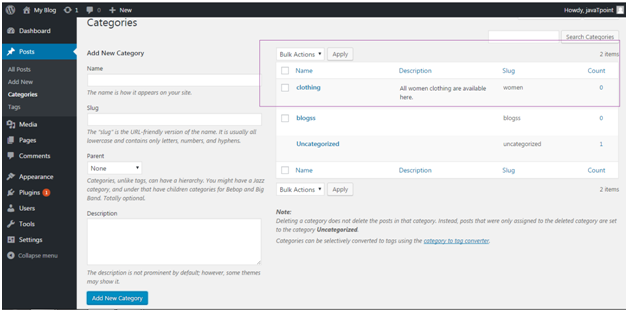
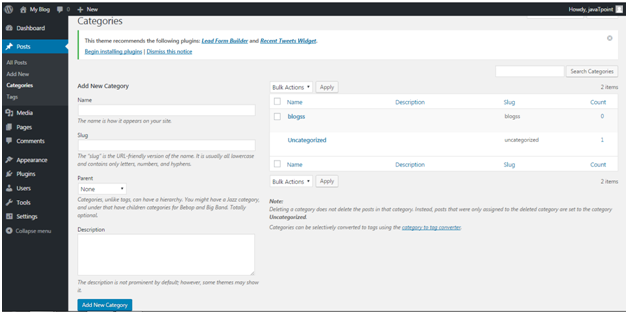
Look at the above snapshot, this is the category section.
How to add categories
Look at the above snapshot, there are four fields to be filled when adding a new category.
Name – Name of category which has to be unique
Slug – It is used in the URL to display your category. For example, if your category is Clothing and slug is women, then your URL will be like shopping.com/shop/women.
Parent – Here, you can add sub-categories to a category or you can choose none. This is optional.
Description – Descriptions are optional. You can add a brief description to your category.
After filling all the above entries, click on Add New Category button. On the right side of the page your new category will be added.
Look at the above snapshot, our new category clothing is added in the category list.
How to Edit Category
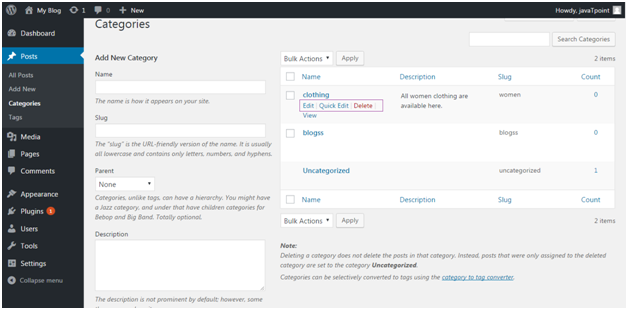
To edit a category, go to Posts > Categories. Hover your mouse to the category you want to edit.
Look at the above snapshot, there are several options to Edit, Quick Edit and Delete. Here you can change category name, slug, parent and description.
Edit – It allows you to edit all the fields name, slug, parent and description.
Quick Edit – it only allows you to edit name and slug.
How to Delete Category
You can also delete categories from the above snapshot. By deleting a category, its posts will not be deleted instead they will be transferred to by default category (if that post will not be listed under any other category).
Please remember you can’t delete a by default category, before deleting it assign by default status to some other category.
How to Convert Category into Tag
Categories and tags both are different things in WordPress. Categories are sections while tags are keywords. WordPress provide you n option to change category into tag and tag into category.
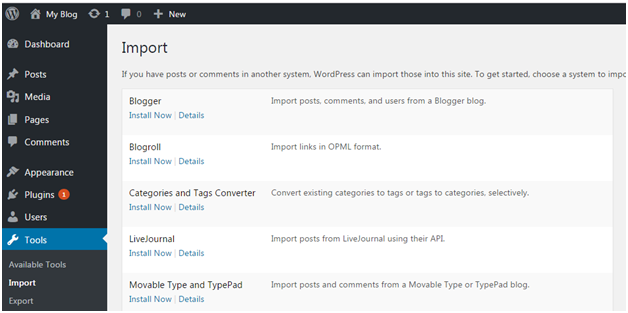
Go to Tools > Import, following screen will appear.
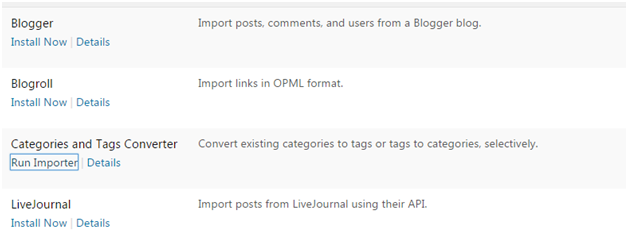
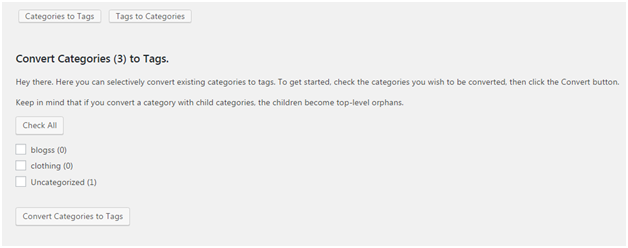
Look at the above snapshot, there is an option of Categories and Tags Converter. It is asking for installation. Click on Install Now button.
Look at the above snapshot, after installation click on Run Importer.
Look at the above snapshot, you can select any option either to convert categories to tags or tags to categories.
Comments allow a user to interact with the blogger or website team. It helps in many ways, like you’ll get to know what your viewers want from you. What else you can do for your viewers. You can activate or deactivate comment box. Comments are by default enabled.
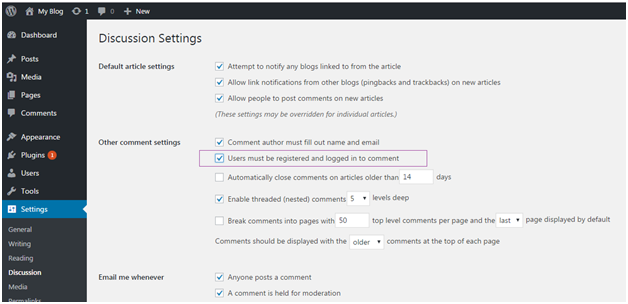
Discussion or Comment Setting Page
Click on Settings > Discussions
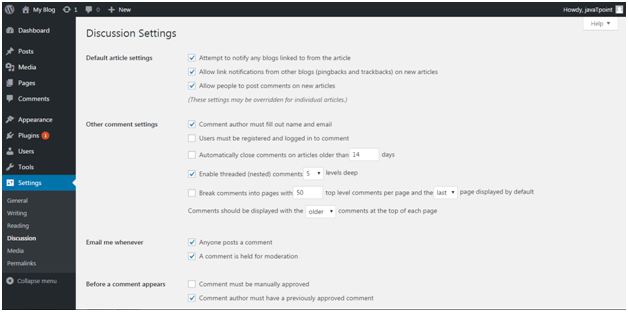
You will be on Discussion Settings page.
Look at the above snapshot, there are many default options.
First part is for Default article settings, applies to all your pages, posts, etc.
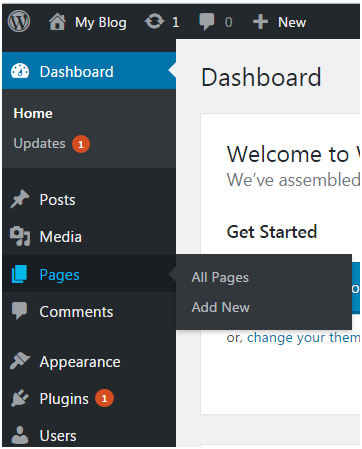
How to Enable or Disable Comment
Go to Pages > All Pages
Select any one of the page you want to add comment.
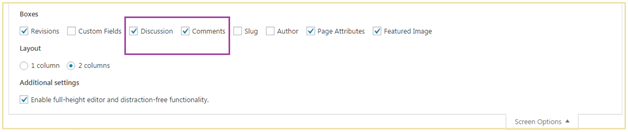
Look at the above snapshot, on the top right, there is a drop-down option. Click it.
Look at the above snapshot, check the Discussions and Comments box.
Look at the above snapshot, there are two checkboxes,
Allow comments – Allow your viewers to add comment on your post.
Allow trackbacks and pingbacks on this page – Viewers can ping and trackback.
Lastly click on Update button to update your post.
How to Edit Comment
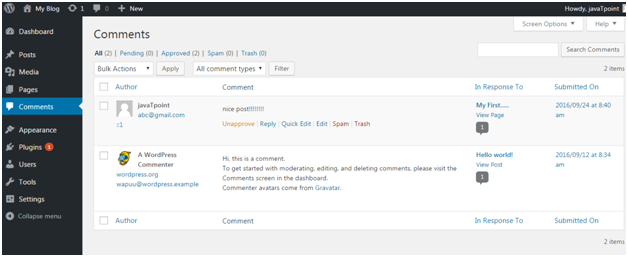
To edit comments, go to Comments side menu,
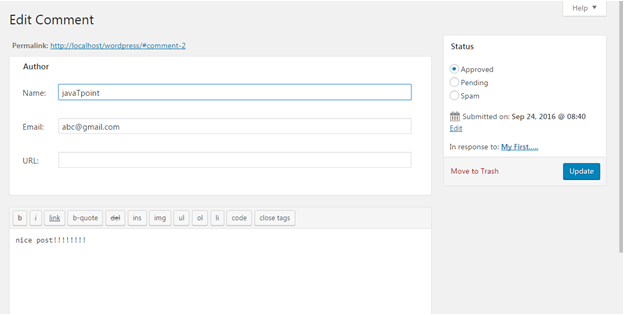
Look at the above snapshot, this is the comment page. Select a comment and click Edit.
Look at the above snapshot, you can edit the comment here and then click Update.
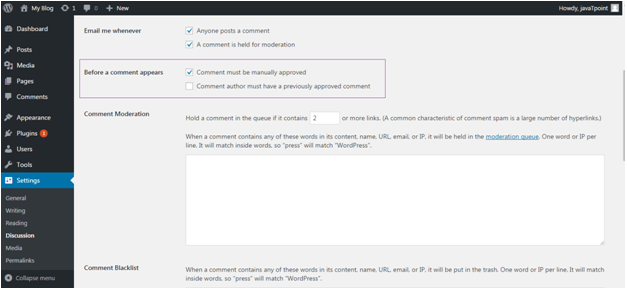
Comments by the visitors on a post are not published directly unless it is approved by the admin. This is called Moderation. You can change comment moderation settings. Go to Settings > Discussions
When you’ll scroll down the page little bit, you’ll see following option.
Look at the above snapshot, check the option Comment must be manually approved.
How to allow only registered users to Comment
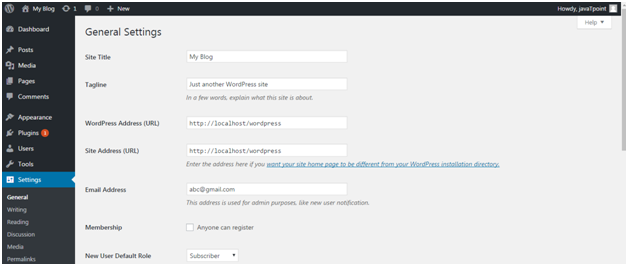
You can allow only registered users to comment on your post. For that, go to Settings > General
Following page will appear.
Look at the above snapshot, check the box Anyone can register.
And if you don’t want a new user to write post on your site then save the column New user Default Role as Subscriber.
Now go to Settings > Discussions
Look at the above snapshot, check the box Users must be registered and logged in to comment.
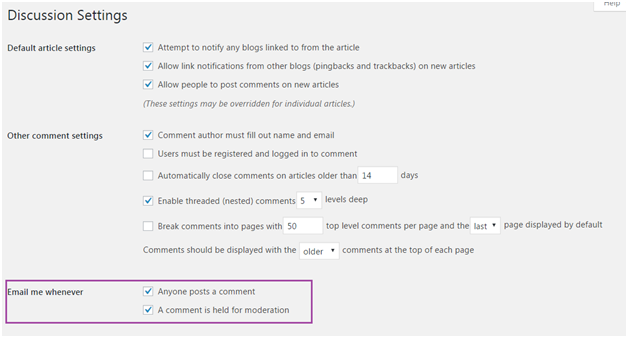
How to Receive Notification for Comment
You can receive a notification whenever someone leaves a comment on your site or waiting to be approved.
You will not receive a notification for a comment marked as spam.
To receive notifications, go to Settings > Discussions
Look at the above snapshot, check the boxes under Email me Whenever to enable notifications.
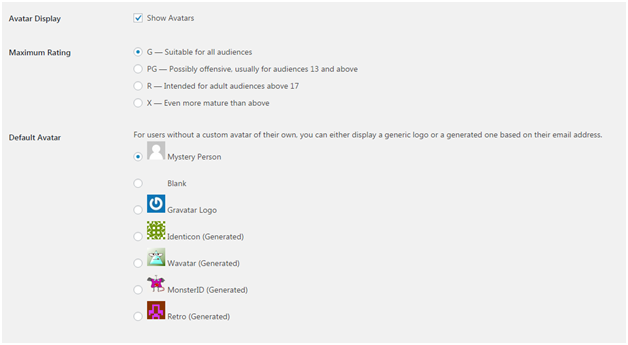
What is Avatar or Gravatar
Word Avatar is used for user’s profile image in online communications. Gravatar is a web based service which allows its users to use avatar image. When a user creates an account in WordPress, it searches for gravatar image matching user’s email address. If user has a gravatar account with an image then this image is displayed as their profile pictures in comments and if not then default avatar image is set.
The default image in WordPress is Mystery Man. You can change it by clicking on Settings > Discussions
Look at the above snapshot, by unchecking Show Avatars, Avatar image will not be there in your website.
Default images can be selected from mystery man and blank image. Other images are selected using algorithms that generate an image based on user’s email address.
Post and page appears to be same on the dashboard as both are used to add content on your site. People get confused in their usage.
Pages are static. Then don’t change frequently. Some examples of pages are contact us, about us, introduction, etc.
Posts are what you make an update on your post. They need to change very frequently as they need to keep your site fresh and attractive for your users.
Posts
Posts are the site content which are published on a site with an exact date and time. They can be categorized in a systematic way on the basis of category and tags. If you are a blogger, then you’ll write posts to update your new blog. They are listed in a reverse chronological order on a site.
They generally consist of informational topics related to education, news, regular activities, feminism or any other topic. The content frequently changes for the end user as new posts are updated regularly. As the post gets older, a user has to dig inside to find it.
Posts have the commenting feature, which can be turned on or off. It allows discussion on your blog if you have turned on the commenting.
As posts are published timely, they made up the RSS content of your blog. Your users will be notified about your most recent posts via RSS feeds.
Pages
Pages are static and not changed frequently such as contact us, about us, privacy policy, etc. They don’t have date and time published, however, database stores the published date or time of the page.
They are not included in RSS feeds as they don’t have date and time published on the page.
They are neither listed by date nor can be categorized by the category and tags. They can make a hierarchy by nesting pages under each other making one of them the parent page.
They are not social, hence they don’t have the commenting option.
Pages are different from Posts. They are static and they do not change often. Some examples of pages are About, Contact, etc. you can add pages containing information about you and your site.
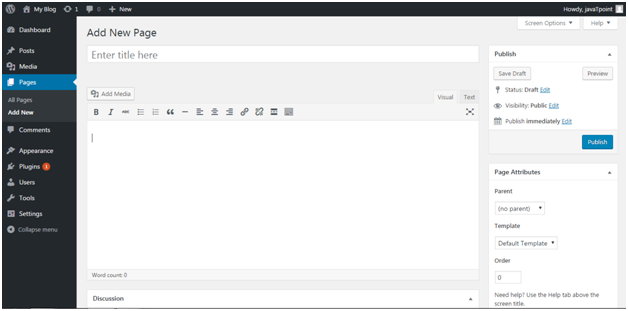
How to Add New Page
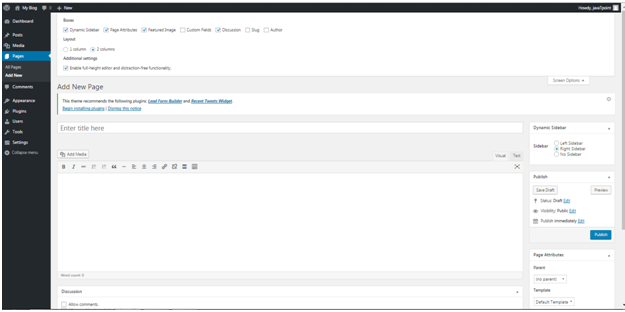
Go to Pages > Add New
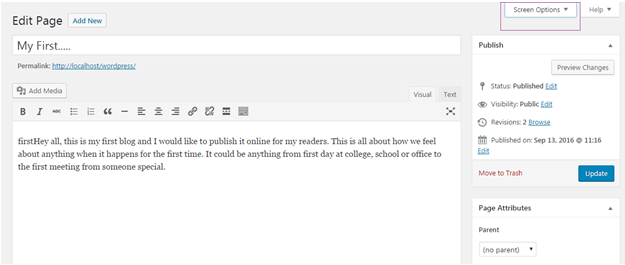
Look at the above snapshot, this is the editorial page where you can give a title and content to your page.
Here you can upload media, write content, add a title to your page. Click on Publish button once you have completed the page.
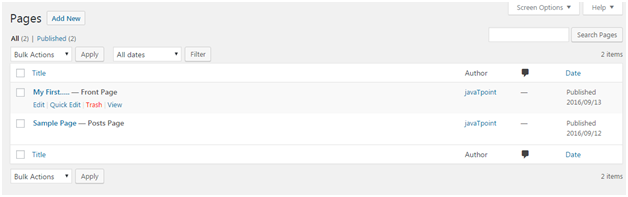
How to Edit Page
To edit page, go to Pages > Add New
Look at the above snapshot, this is the list of all the created posts. Bring your mouse above a post, following options will appear.
There are two options to edit. One is Edit and other one is Quick Edit.
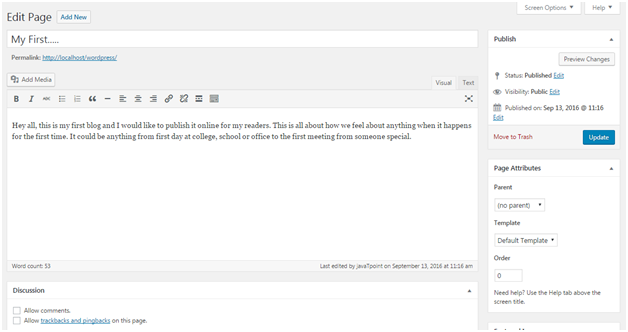
On clicking Edit, following page will appear.
Look at the above snapshot, here you can edit title or content of your post.
On clicking Quick Edit, following page will appear.
Look at the above snapshot, here you can edit title, date and slug of your post. And if want, you can also change category for your post.
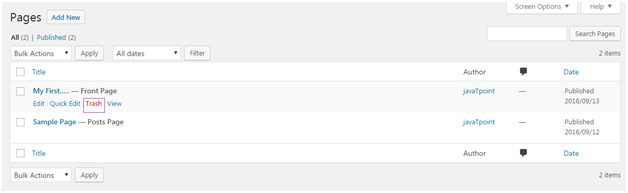
How to Delete a Page
To delete a post, go to Posts > All Pages
Look at the above snapshot, Trash option will let you delete the respective post.
Posts allow you to write a blog and post it on your site. They are listed in reverse chronological order in front page of your blog.
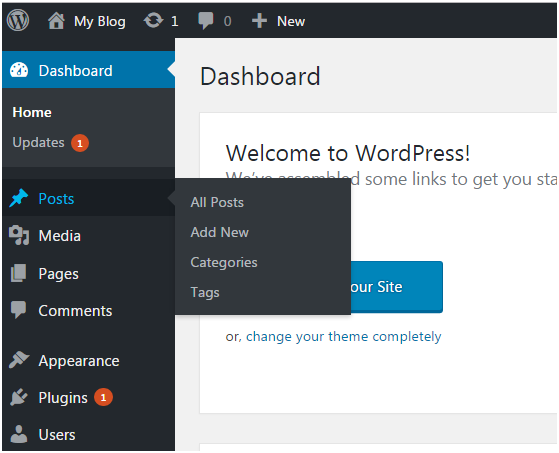
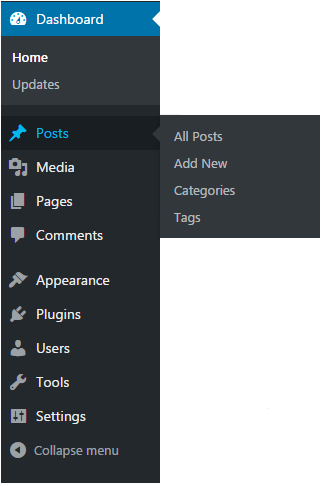
Look at the above snapshot, these are the sub-menus of posts.
How to Adding new Post
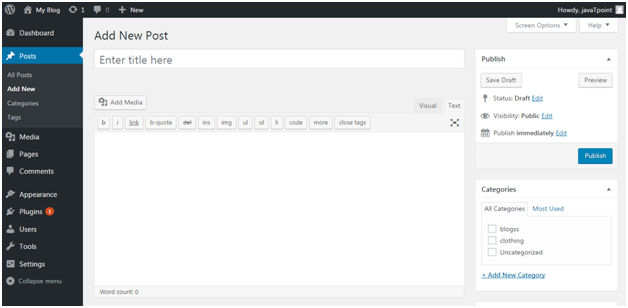
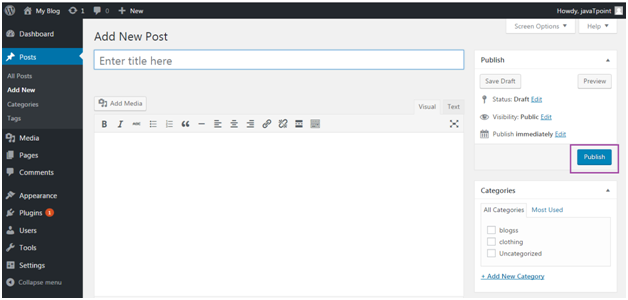
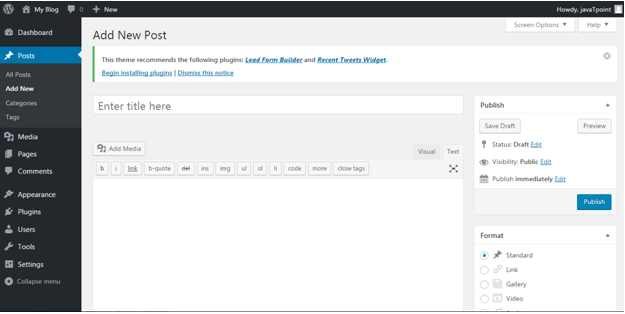
Go to Posts > Add New.
Look at the above snapshot, editor page will appear in front of you. There are two fields,
Title – Enter the title of your post
Content – Here you have to write content of your post.
In Visual mode, you can write in normal format.
In Text mode, you can write in HTML format.
Preview – This button allows you to have a look on your post before publishing it.
How to Publishing Post
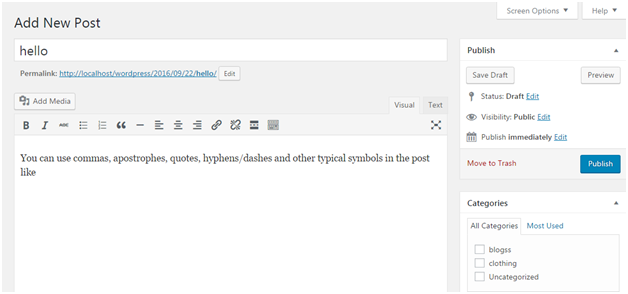
After filling above two fields click on Publish button. It means you are ready to publish your blog on your site.
Look at the above snapshot, there are some other options available in publish section.
Preview Post/Preview – Let you see a preview of your post before publishing it
Permalink – It stands for permanent link. It contains a user-friendly post name derived from post title. This can be edited using “Edit” button.
Save Draft – A post can be saved here
Status – Let you change the status of your post to Pending and Draft.
Visibility – Change visibility to Public, Password protected and Private.
Publish – Change the post publish date and time
How to Edit Post
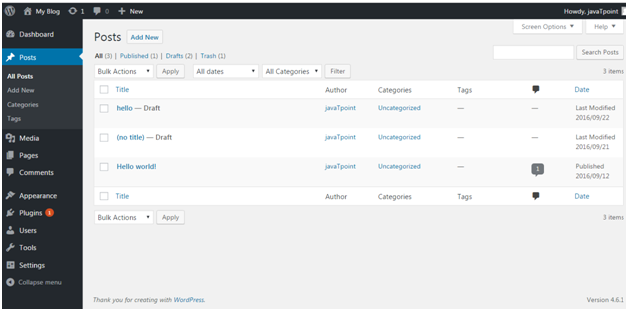
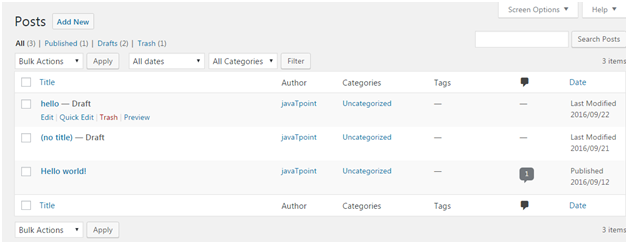
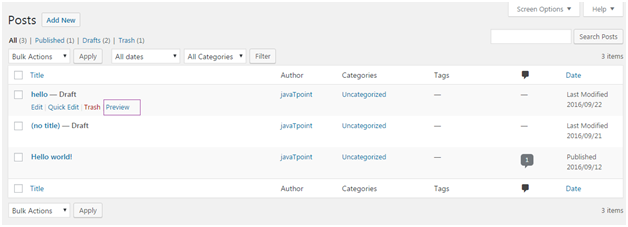
To edit post, go to Posts > All Posts.
Look at the above snapshot, this is the list of all the created posts. Bring your mouse above a post, following options will appear.
Look at the above snapshot, there are two options to edit. One is Edit and other one is Quick Edit.
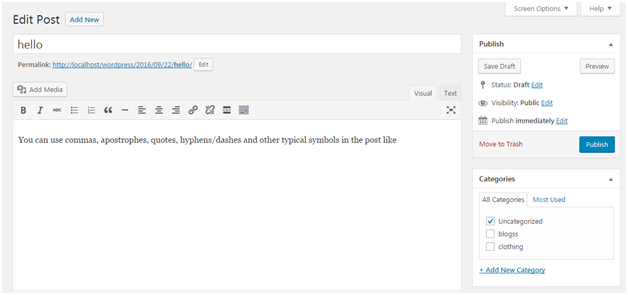
On clicking Edit, following page will appear.
Look at the above snapshot, here you can edit title or content of your post.
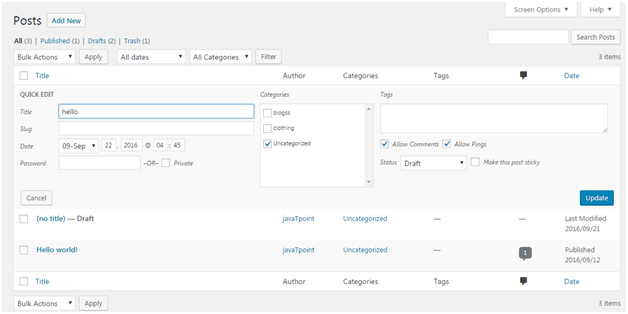
On clicking Quick Edit, following page will appear.
Look at the above snapshot, here you can edit title, date and slug of your post. And if want, you can also change category for your post.
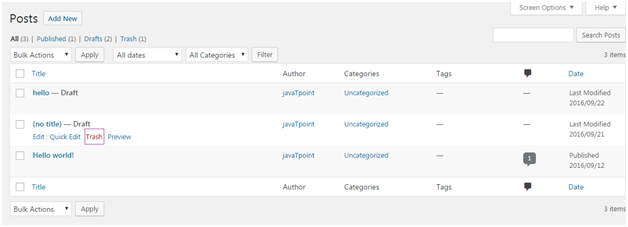
How to Deleting a Post
To delete a post, go to Posts > All Posts
Look at the above snapshot, Trash option will let you delete the respective post.
How to Preview Post
Preview option helps to see you your post before publishing it to the public. It is better to have a look on your post that how it looks before publishing it to the world.
Go to Posts > All Posts
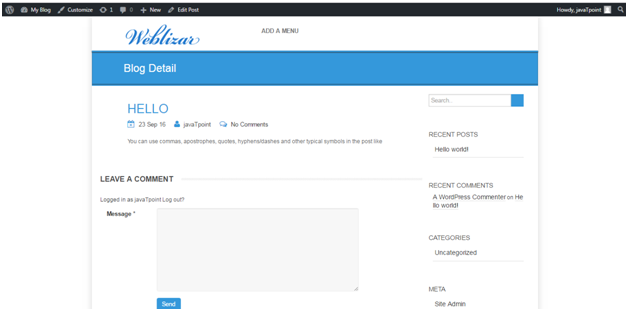
Look at the above snapshot, on clocking Preview, following page will appear.
Look at the above snapshpot, this is the preview of our post. It gives you an idea whether your post need an edit or not.
How to Publish Post
From Publish button you can make your post available to your viewers.
Go to Posts > Add New
Look at the above snapshot, after writing your post click on Publish button. And your post will be published publically.
Creating a site on WordPress is very easy. WordPress is designed in such a way that even non-tech users can also design their own websites easily and attractively.
Here, we’ll discuss each and every step involved in creating a WordPress site.
Selecting a right platform
Choosing a domain name and host
Choosing a theme/template
Creating new pages
Adding Content
Adding Media
Installing plugins
Selecting a right platform
First you have to decide a suitable platform to build your website with. Here platform means either you want to create your website using HTML, CSS or using a CMS (Content Management Systems).
There are various popular CMS in the market like WordPress, Drupal, Joomla, DotNetNuke, etc.
Why choosing WordPress
For a beginner WordPress will be the best as it doesn’t need any technical skills and due to its flexibility it is suited for all type of users.
You’ll get a lot of options to select a theme as a wide range of community design themes for WordPress. It can handle any type of website whether large or small. Most known websites like CNN, NASA, eBay use WordPress.
Above all, it gives you a responsive site which makes it compatible with small screen devices like mobile phones and tablets.
Shared hosting is best choice for beginners. You can later upgrade your site’s hosting according to the site’s traffic.
Choosing a domain name and host
You need a domain name and a hosting space to get your website online.
Domain name enables you to give your site your own name while hosting gives a space to your site on a server which makes sure your website loads quickly and won’t go down for hours.
Domain name should be short and easy to remember, brand able and catchy which defines your business.
Choosing a domain name is not easy with fulfilling all the criteria as million of domain names are active.
Choosing a theme/template
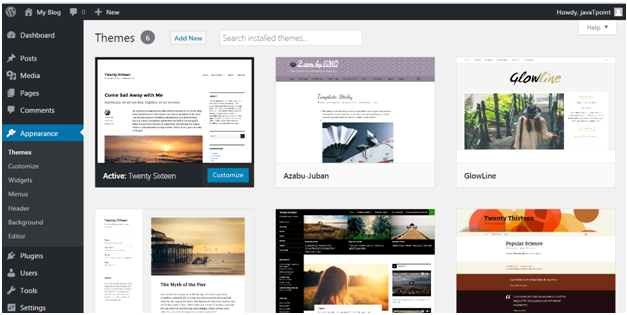
After installing WordPress, a site appears very plain. To make it more attractive, users install best suitable themes for their site. It adds visuals and views to the front page.
First of all, login to your WordPress site. By default, first screen will be your dashboard.
Accessing Free themes
After login, you’ll get access for 150 free themes.
At the end we all will come to this point to make our site popular. We need to post different things to increase the popularity of our site.
Clicking on Post > Add New option, the above page will appear on the screen.
There are two ways to write a post, either you may write in Visual editor or in Text editor (in HTML format). Currently this snapshot is of Text editor.
Adding Categories
You can divide your content in different categories by adding categories to them. This tool is handy when you are publishing content for more than one field.
Click on Posts > Categories, you will be directed to the above page.
Here, in Name add a title to your new category. In Slug, you can add some words which will become part of URL while searching.
Tags
Tags are very much similar to Categories with only one difference that each post has its own set of tags.
Enabling or Disabling Comment
Comment creates a debate on some posts or sites. Some users don’t want their visitors to comment. They can shut comment off in WordPress.
To disable a comment for a particular page
Go to Pages > Add New
Click on Screen Options on top right
Tick on Discussions box
Scroll down, untick Allow Comments option
Go to Settings > Discussions
Untick “Allow people to post comments on new articles”
Sidebar which generally appears on the right side (sometimes appears on left) contains widgets like Archives, Categories and Meta, etc.
To edit the side bar, go to Appearance > Widgets
Use drag n drop method to either use a widget or remove a widget.
Adding Media
Every website needs some photos and videos to describe its content and value. WordPress also provide functionality to add a media. You can add image caption, title and description along with media. Also add alt text helps search engine to identify the image.
Installing plugins
Plugins are the extensions in the WordPress with certain piece of coding expanding specific function to you site. They are not built-in.
There are almost 25,000 different plugins options to choose from.
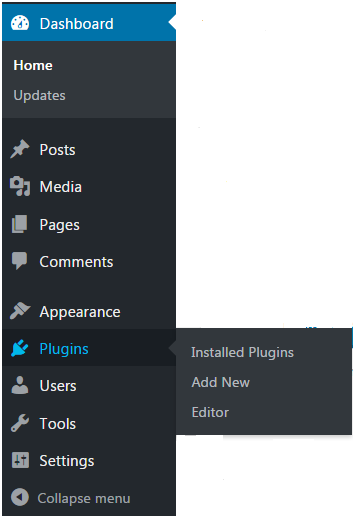
Installation a plugin is very simple. Click Plugins. You will see three options, as shown in the snapshot below.
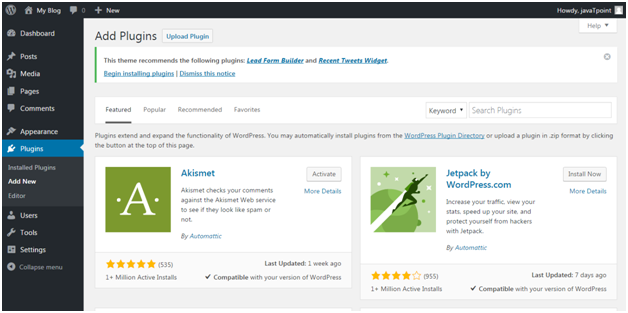
Click on Plugins > Add New. Following screen will appear in front of you.
You can choose a plugin from the given options. Just click Install Now and you will be able to use it.
WordPress Dashboard allows full access to manage a website behind the scenes. It is the default page in admin panel which comes right after the login page. It mainly represents everything that is happening with your blog. You can check everything here related to your post. It gives you the updates about your website. If you want to change your password or change any type of setting this is the place where you need to come.
All the content of dashboard is grouped into widgets. You can be hide/show these widgets as per your requirement. Their positions can also be changed using drag and drop action.
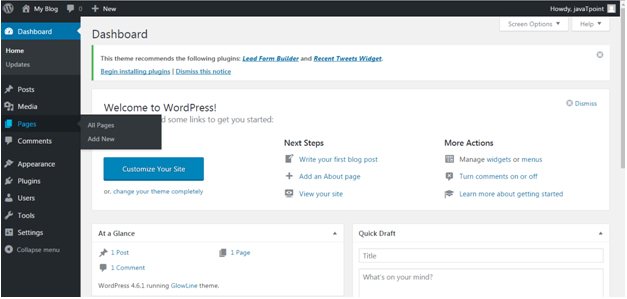
Look at the above snapshot, this is the login page for WordPress. After filling information click on Log In button, you will be directed to Dashboard screen which is shown below.
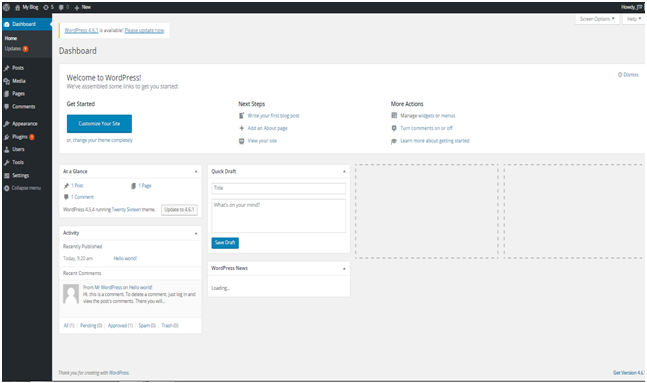
The above snapshot is the dashboard of WordPress.
We’ll explain following points from the dashboard.
Admin bar
Sidebar Menu
Welcome to WordPress
At a Glance
Activity
Quick Draft
WordPress News
Screen Options
Admin Bar
The black bar at the top represents admin bar. It only displays when admin is logged in. That’s why this is called admin bar.
Look at the above snapshot, this is the admin bar displayed at our account.
It contains the following items:
A WordPress icon – It contains information about WordPress, WordPress.org, documentation, etc.
Home of your site – It brings you to the Home page of your site
Notifications – All the notifications will be shown here. We have 5 notifications here.
Comments – Display comments on your blog where you can edit, reply or delete a comment.
New – You can add up a new page, post, media or user.
Admin name – It is displayed at the right end of the admin bar showing logged in user name (currently logged in user name is JTP). You can edit your profile and Logout from here.
Sidebar Menu
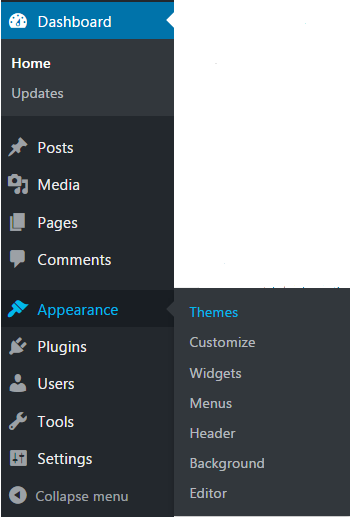
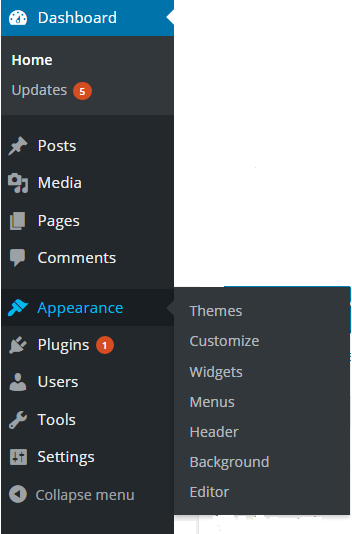
Look at the above snapshot, it is the side menu of the dashboard which contains full menu of options. These options allow easy access to different areas of your site.
A sub-menu list may appear on selecting an option. Like here we have shown sub-menu list of Appearance.
Menu content:
Dashboard – Display received updates
Posts – Manage posts on your blog
Media – Manage media content library like images, audio and video
Pages – creating and managing pages
Comments – display all the comments on your blog
Appearance – change the appearance of your site
Plugins – extend capabilities of the website and manage them
Users – shows all your site’s users. Allows editing your site by changing password and name
Tools – setting of website
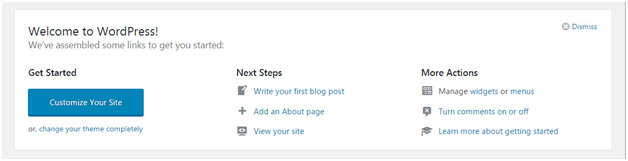
Welcome to WordPress
This is displayed at the top middle of the dashboard. There is a button to customize your site using different themes. It contains different links to create blog, view your site and many more as shown above.
There is an option at the top right corner to remove this widget. If you want to remove it you can. But if you want it back, click on screen options drop-down menu.
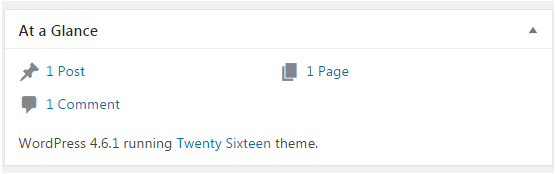
At a Glance
You can have a look on how many posts, pages and comments are there in your site. These comments also include spammed comments. It tells about which theme is currently running on your site.
It also tells about some additional information if some plugins are installed.
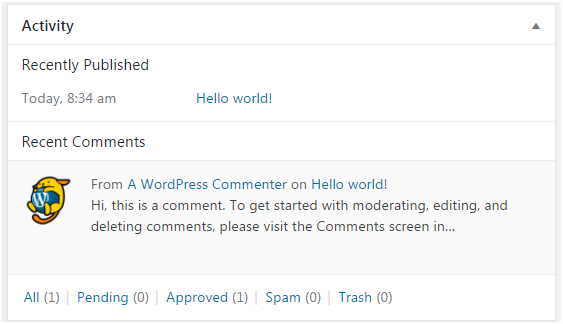
Activity
This widget provides you information about some of your recent posts. It displays the recent comment on your post.
Look at the above snapshot, there is one recent comment in our activity widget.
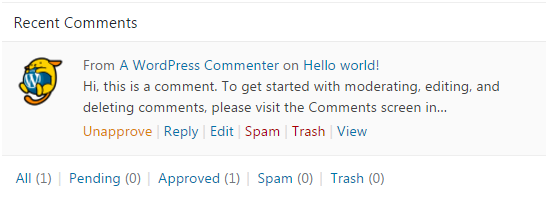
On doing hover with mouse at a comment, different actions appear below the comment like editing, deleting, replying, etc.
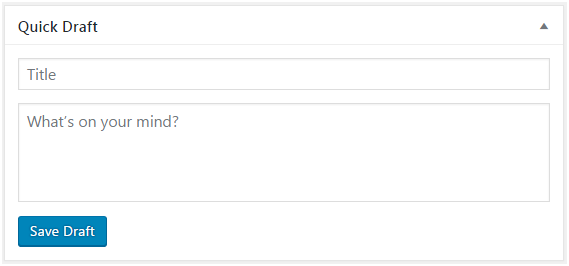
Quick Draft
Quick draft widget is a way through which you can write your ideas and save it in a draft form. Later you can write a blog on it.
WordPress News
This widget displays latest blog posts from the WordPress official blogs. Look at the top right corner if you’ll click on this arrow, this widget will hide.
Screen Options
As you already know each of the widget can be enabled and disabled in your dashboard area. To do so, there is Screen Options widget which allows you to enable or disable different widgets.
You can also minimize or drag a widget according to your need.
Installing WordPress is very easy and takes less than five minutes to complete. It is best known for its ease of installation. All web hosting companies allow WordPress installation within few clicks.
There are different methods to install WordPress on a system.
Methods to install WordPress
Using cPanel
This is the fastest and easiest way to install WordPress on your system using cPanel software. The most common tools available to automatically install WordPress are Softaculous, SimpleScripts, Fantastico and De Luxe. All the web hosts allow one-click installation through these tools.
You only have to choose one WordPress host and use installation script in cPanel. You will get your login details and URL link of cPanel via email after signing up for hosting plan.
Using MS Webmatrix
There is a free software program named Microsoft Webmatrix which allows WordPress installation on local system. But this installation is only for Microsoft users.
This software creates a local server, database and everything else needed for the WordPress installation on the system itself and hence, it doesn’t need any live server.
After installation through this method you can easily switch to live web server after choosing a web host.
On local server
To install WordPress on local server you can use software like XAMPP, WAMP and MAMP (for Mac users). These software provide you a server generally Apache, database MySQL on PhpMyAdmin which is required for the installation.
Here, you only have to create a WordPress database using PhpMyAdmin and edit wp config file.
Manually using cPanel or FTP
Manually WordPress can be installed using either cPanel or FTP. It creates a new database to connect your files and database by uploading WordPress files to the root directory on your web server.
This process involves a bit technical knowledge and hence this is not recommended for the beginners level.
Prerequisites before installing WordPress
Before installing WordPress you need to make sure the availability of certain things.
They are as follows:
Downloaded latest version of WordPress
A good web hosting company’s hosting account with FTP access
WordPress.com is the site where you don’t have to do anything. All the developing work will be handled itself. You don’t have to purchase software, manage web server or pay for hosting.
There are some limitations with this site. For example, by default your domain name includes wordpress.com, you can’t modify your site’s coding, upload any themes or plugins. Your site will be free for the lifetime, but you have to pay to upgrade it for more specifications.
Upgrades also allow you to use a custom domain like you can use anything as the domain. Further upgradation also enhances appearance of your site, upload videos or photos and many more.
Your site will be secured and spam free as it will be under WordPress security. You only have to sign in and choose your blog name and focus on your content.
This site is preferred by everyone but mostly bloggers, photographers, artists, etc.
WordPress.org
WordPress.org is the site where you have to manage your own blog or website. You can find free WordPress software and install on your web server.
It gives full control and freedom over your site including the WordPress software. Most of the WordPress showcase sites are made on self hosting.
With full control it also places full responsibility of the site upon the user. From technical dealing to security issues each and everything has to be managed by the user itself.
WordPress.com vs WordPress.org
Features
WordPress.com
WordPress.org
Definition
Fully hosted version
Self hosted version
Cost
Charges required for upgradation
No charges for upgradation
Freedom and limitations
Include more limitations
Include less limitation
Maintenance
No responsibility to maintain the site
All responsibilities comes on user
Advantage
Security and backups are provided
You need to find a host to provide backup and security
Themes
Choose a theme and use it with the help of custom design
Need to install custom themes then use it with PHP and CSS